Why does your sourdough fall flat? Unlock the secrets of artisan bread.
Prompted by NerdSip Explorer #5254
Master hydration, fermentation, and shaping for perfect sourdough.
A sourdough starter isn't just a simple mix of flour and water; it's a bustling microscopic city! When you combine these two humble ingredients, you invite wild yeast and lactic acid bacteria (LAB) to move in and set up shop.
While commercial baker's yeast is just a single strain engineered for rapid speed, wild yeast works slowly and steadily. But the real magic comes from the LAB. These wonderful bacteria eat sugars and produce lactic and acetic acids, which give sourdough its signature tangy flavor, chewy texture, and longer shelf life.
To keep your starter healthy and active, you need to discard and feed it regularly. Discarding isn't just about controlling the sheer volume of dough; it keeps the environment acidic enough to ward off bad bacteria while reducing the population so your yeasts don't quickly run out of food.
A mature, freshly fed starter will double (or even triple) in size, becoming incredibly bubbly and web-like. That beautiful, airy structure is your green light to start baking!
Key Takeaway
Your starter is a symbiotic community of wild yeast for rise and lactic acid bacteria for that signature tangy flavor.
Test Your Knowledge
What is primarily responsible for giving sourdough bread its distinctive tangy flavor?
Ever wonder why advanced sourdough recipes use weights instead of measuring cups? It's all about Baker's Math. In this universal baking system, flour is always 100%, and every other ingredient is expressed as a percentage of that total flour weight.
If a recipe calls for 1000g of flour and 750g of water, that's a 75% hydration dough. Hydration is the secret code to bread texture! By tracking hydration, you can easily scale a recipe up or down without doing complex fraction conversions.
Lower hydration doughs (around 65%) are stiffer, easier to handle, and produce a tighter crumb structure ideal for sandwiches. Higher hydration doughs (75% to 85%+) are sticky, jiggly, and yield those gorgeous, large open holes (the open crumb) you see on rustic bakery shelves.
As a level-4 baker, mastering hydration is your next big leap. Don't rush into an 85% hydration dough right away! Start around 70-75% until you are completely comfortable handling sticky dough without instinctively adding extra raw flour.
Key Takeaway
Baker's Math uses the total weight of flour as 100% to easily calculate hydration and scale recipes with precision.
Test Your Knowledge
If a recipe requires 500g of flour and 350g of water, what is the hydration percentage?
Sourdough requires a strong gluten network to trap the gases produced by your wild yeast. But instead of vigorous, exhausting kneading, artisanal bakers use two incredibly gentle techniques: the autolyse and the stretch and fold.
An autolyse (pronounced auto-leese) involves mixing only your flour and water and letting it rest for 30 to 60 minutes before adding salt or starter. This resting period allows natural enzymes to break down starches and hydrates the proteins, kickstarting gluten formation with zero effort!
Once your dough is fully mixed, you'll perform a series of stretch and folds. With wet hands, you gently pull one side of the dough up and fold it over itself, rotating the bowl until you've folded all four sides.
Traditional kneading can sometimes overwork the dough and destroy the airy texture. This gentle stretching aligns the gluten strands perfectly, building a strong, elastic web that can expand like a balloon in the hot oven without tearing.
Key Takeaway
Resting the dough (autolyse) and using gentle stretch and folds builds a highly elastic gluten network without heavy kneading.
Test Your Knowledge
What is the primary purpose of performing an autolyse?
The most critical phase of sourdough baking is bulk fermentation. This is the first, long rise where the dough ferments as one large cohesive mass. It's the stage where complex flavor develops and the dough builds its initial volume.
Unlike baking with commercial yeast, sourdough bulk fermentation isn't strictly judged by the clock. Ambient temperature plays a massive role! A dough might finish its bulk phase in just 4 hours on a hot summer day, but take 8 hours in a chilly winter kitchen.
You must look for signs of life rather than watching the timer: the dough should increase in volume (usually by 30% to 50%), feel light and airy, and have smooth, domed edges that pull away from the bowl.
After shaping your loaf, it undergoes its final rise, or proofing. Many bakers opt for a cold retard—placing the shaped dough in the fridge overnight. This dramatically slows down the yeast but allows the bacteria to keep working, deepening that complex flavor!
Key Takeaway
Bulk fermentation is highly temperature-dependent and should be judged by the dough's volume and airy texture, not the clock.
Test Your Knowledge
Why do many sourdough bakers choose to put their shaped dough in the fridge overnight (a cold retard)?
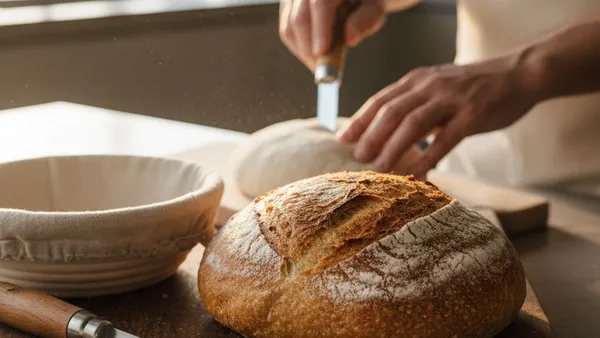
You've carefully mixed, folded, and fermented. Now it's time for the grand finale: baking! But before your bread hits the blazing heat, you must score the dough by making a decisive, angled slice across the top with a razor blade or sharp knife.
Scoring isn't just for beautiful bakery aesthetics. As the bread bakes, the trapped gases rapidly expand in a dramatic process called oven spring. If you don't score the dough, it will burst open unpredictably at its weakest point. Scoring creates a designated weak spot, guiding the expansion perfectly to form that coveted, crispy ear.
To maximize oven spring, sourdough needs steam. Steam keeps the exterior crust soft during the first 15-20 minutes of baking, allowing the loaf to expand fully before the crust hardens and sets in place.
The absolute easiest way to trap steam at home is by baking your loaf inside a preheated Dutch oven with the lid securely on. When you finally remove the lid, the crust can bake into a blistered, caramelized shell!
Key Takeaway
Scoring guides the rapid expansion of the dough, while steam ensures the crust stays soft enough to allow maximum oven spring.
Test Your Knowledge
Why is steam critical during the first part of baking a sourdough loaf?
Track your progress, earn XP, and compete on leaderboards. Download NerdSip to start learning.