Why settle for grocery store bread when you can bake living art?
Prompted by A NerdSip Learner
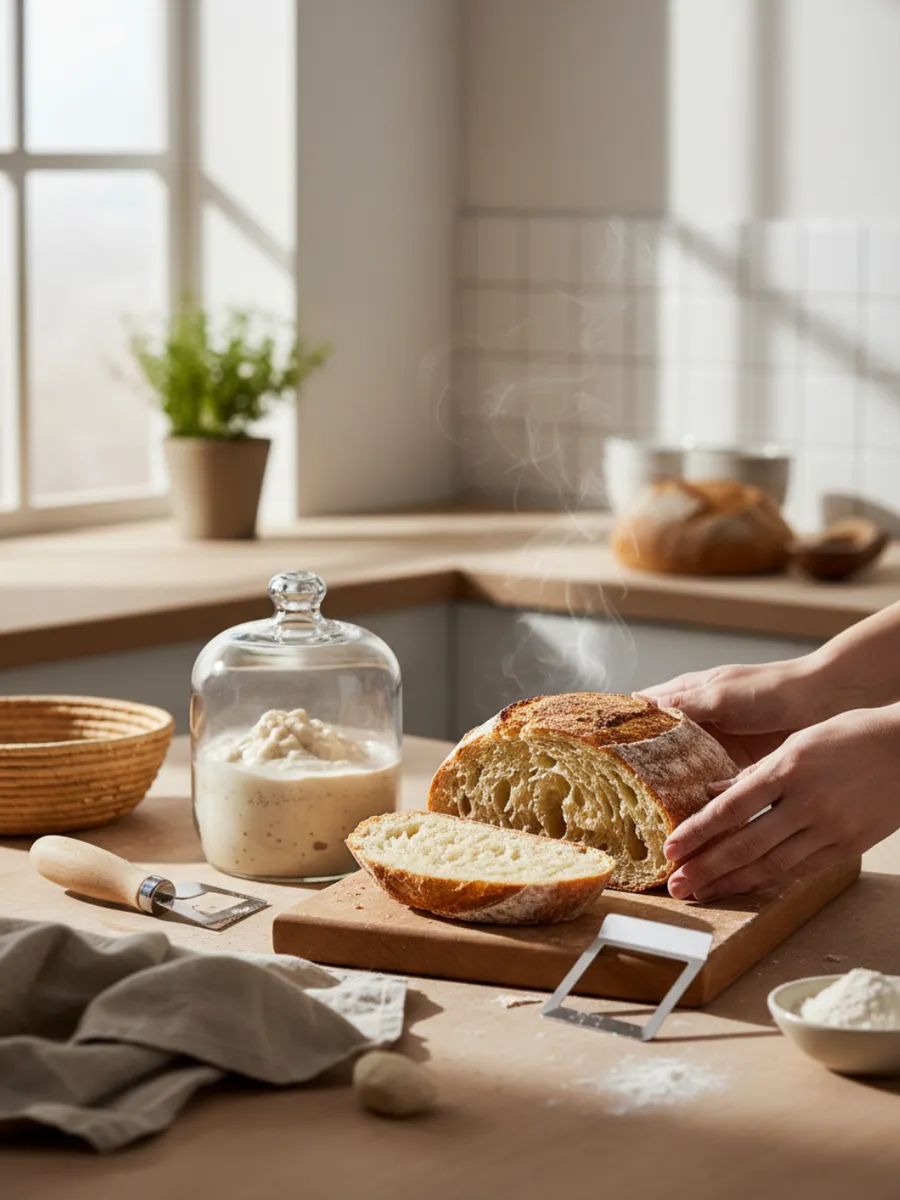
Bake your first golden, professional-grade sourdough loaf from scratch.
Welcome to the world of sourdough! Before we bake, we need to meet the star of the show: the starter. Think of a sourdough starter not as an ingredient, but as a tiny, bubbly pet that lives in a jar on your counter. Unlike the dried yeast you buy in packets at the store, a starter is a colony of wild yeast and friendly bacteria captured right from the air in your kitchen. It’s a living thing that needs love and attention!
Why go through the trouble? Because this wild yeast creates a flavor and texture that store-bought yeast just can't match. It makes bread that is tangy, chewy, and easier for your body to digest. Getting a starter going is your first step. It might look like a simple goop of flour and water, but inside, it is teeming with microscopic life waiting to turn heavy dough into fluffy bread. Let’s get ready to raise your new pet!
Key Takeaway
A sourdough starter is a living culture of wild yeast and bacteria, not a dormant commercial powder.
Test Your Knowledge
What is the best way to think of a sourdough starter?
Just like any pet, your starter gets hungry! To keep it alive and active, you have to feed it regularly. The food is simple: just flour and water. When you mix fresh flour and water into your jar, the yeast wakes up and starts eating the natural sugars in the flour. As they eat, they release gas bubbles. This is a good sign! It means your starter is happy, healthy, and digesting its meal.
You'll know your starter is ready to bake with when it looks frothy, bubbly, and has doubled in size after a feeding. This usually takes a few hours. If it looks flat and smells like old vinegar/acetone, it’s just hungry—don't throw it away! Give it a meal of fresh flour and water, and watch it bounce back to life. Keeping this cycle going is the secret to strong bread.
Key Takeaway
You must feed your starter flour and water to create the gas bubbles necessary for rising bread.
Test Your Knowledge
How do you know your starter has successfully eaten and is active?
Now comes the messy, fun part! Mixing your dough is where the magic begins. You will combine your bubbly starter with flour, water, and a pinch of salt. At first, this won't look like a smooth loaf of bread at all. It will look like a 'shaggy mass'—lumpy, sticky, and uneven. Don't panic! This is exactly what it is supposed to look like at this stage.
Beginners often think they made a mistake because the dough sticks to their hands. Resistance is normal! Imagine you are mixing wet sand and glue. You don't need a fancy machine; your hands are the best tools. Just squish everything together until there are no dry bits of flour left. Once it's mixed, we let it rest. This rest period allows the flour to fully absorb the water, making the dough easier to handle later.
Key Takeaway
Ideally, your dough starts as a sticky, shaggy mixture that just needs to be combined thoroughly.
Test Your Knowledge
What should the dough look like immediately after mixing?
Sourdough is not a race; it is a slow, relaxing stroll. After mixing, we enter the 'bulk rise' or fermentation stage. This is where the yeast does all the heavy lifting for you. Over several hours, those little yeast creatures are burping out gas bubbles, which get trapped inside the sticky dough. This is what makes the bread puff up and become airy instead of a dense brick.
You don't need to knead it constantly. Instead, we do something called 'folding' every hour or so—gently stretching the dough and folding it over itself like a blanket. This strengthens the dough so it can hold those gas bubbles in. You'll know it's done rising when the dough feels jiggly, full of air, and has grown significantly in the bowl. It’s like a slow-motion balloon inflating!
Key Takeaway
The dough needs several hours to ferment and rise, filling with gas bubbles that create fluffy bread.
Test Your Knowledge
What is the yeast doing during the long rising period?
It’s finally time to bake! Sourdough loves high heat. We usually bake it in a very hot oven, often inside a heavy pot (like a Dutch oven) with a lid. The lid traps steam, which keeps the crust soft at first so the bread can expand one last time—this is called 'oven spring.' It's the final explosion of growth before the crust hardens.
After about 20 minutes, you remove the lid to let the crust turn a beautiful, deep golden brown. The smell will fill your entire home! How do you know it's done? Take it out and tap the bottom of the loaf with your knuckle. If it sounds hollow, like a drum, you did it! You’ve turned flour, water, and patience into a crusty, delicious masterpiece.
Key Takeaway
Baking with trapped steam helps the bread rise, and a hollow sound when tapped means it's fully cooked.
Test Your Knowledge
Why do we tap the bottom of the loaf after baking?
Track your progress, earn XP, and compete on leaderboards. Download NerdSip to start learning.